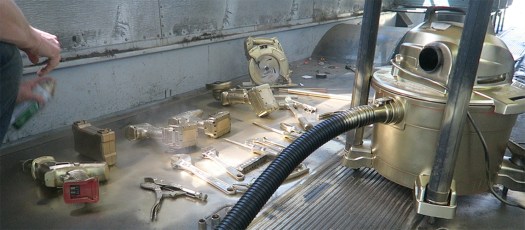
So one of my favorite YouTubbers is a guy named Jimmy DiResta. In one of his videos he talks about how he uses white spray paint on many of his tools as a way for him to engage his audience. I think this is genius.
Also, I’ve never been a big fan of rocking brands. No matter if it’s skiing, running, programming, fashion or anything else. At the end of the day, I like having no logos on my stuff.
Finally, I think having golden tools will inspire some more interested YouTube audience people who like the idea or hate it.
So in this video we spray-paint the tools gold and cut out the rest of the seats in the bus.
If you’d like to learn more about John Muir and what he did to preserve forest lands on the west coast, learn about him on wikipedia here or you can go deep and read the biography.
Ariel drone photography is problematic for those seeking to make great movies for the internet. Here’s my thinking:
Shooting video with a drone is extra fun. The person driving the camera is generally having the time of their lives, so they love the footage they get.
The problem is that those shots are far more interesting for the person who shot it than it is for the person who watches it.
Unboxing a DJI Mavic Pro is a lot of fun. It’s like unwrapping a private aircraft. This is a quick blog and a video about my experience. I’m trying to keep it short and interesting.
Unboxing a DJI Mavic Pro
So the unboxing is great. They package the drone well. Packaging is fine, but the thing that I like the most is the ability to take a camera from the box and use it 10 minutes later. The DJI Mavic Pro scores pretty well on this scale.
At the end of the day, it’s a really complex device. The fact that they sent me a box and I was able to fly a drone and take 4k video from the sky is pretty amazing.
Setting it up is not the most intuitive thing ever. It took a bit of focus and I actually had to glance at the instructions for a few minutes to understand how to charge the thing.
As you can see by the end of the video that it takes a little bit of time to set up once I connect my phone to the remote control. This is annoying because they force you to register for an account with the DJI application. That’s a bit annoying, but at the end of the day, it’s a minor inconvenience.
Once you get it in the air… wow.
These things are a lot of fun. I’d say it’s easy to fly. Many people warned me that I should practice flying before I use the Mavic Pro. They warned me that I risked crashing it if I didn’t have experience flying a drone. At the end of the day, those warnings were warrantless.
It’s an easy thing to fly. I don’t think anyone needs to practice. Just take off and learn on the fly.
If you’re inspired to get one, Amazon will ship it to you quickly. I mean, you only live once right. Get it here.
Specifically, I’m using 1-Quart Simple Premium Grout which is pre-mixed so I don’t have to mix it myself. This is most useful for when applying grout to a small area. This project is about a 4 square foot area, so it’s a very simple application.
Equipment Needed to Apply Grout
PreMixed Grout – http://amzn.to/2mruyxD
Grout float – http://amzn.to/2mucKS
Soft Grout Sponge – http://amzn.to/2mJRPf0
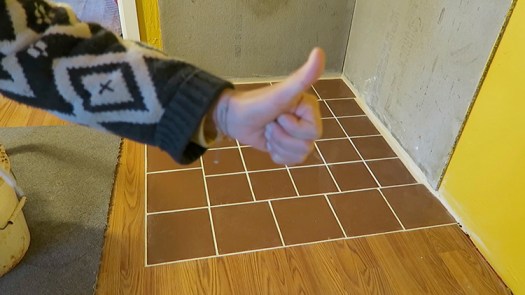
Sorry this photo is out of focus
How to Apply Grout – Just the Steps
Get all your pieces together.
Set the tiles using ready set cement and spacers.
Take the grout from the quart container and push it into the spaces between the tiles. Do this for about 1-3 square feet.
Use a sponge to wipe the unnecessary grout away. Try to keep the sponge as dry as possible. Only sponge the grout once or twice, then rinse and squeeze dry your sponge.
Change water often. As the water gets dirty, you’ll be less effective in cleaning up the tile.
Repeat across all surface area that you want to be grouted.
Once you have the project covered, wait four hours for the grout to cure.
Once grout is cured, go back over the whole project and clean up all the unnecessary grout. Especially make sure to wipe off the haze on your pretty tiles.
That’s it. Once you clean it up for the final time, let the grout sit for 48 hours. Then you’re done.
Overall Thoughts on the Product
This grout isn’t excellent. I’ve noticed a bit of chipping since installing the floor. Because we put corrugated steel siding behind the stove, we had to stand on the tile to get the steel working. Maybe if we had waited another day the grout would have hardened up better.
Also, the wood to tile joints don’t seem to be quite as strong as the tile to tile joints.
I like the simplicity of just opening up the container and grouting. That is far easier than doing it the traditional way. Traditionally, you mix up grouting dirt with water using a drill with a mixer attachment on it. That requires more tools, more focus and more experience. This pre-mixed grout is far more approachable, especially if you’re new to grouting.
Anyways, that’s all I’ve got for now. I hope you find this useful. If you have any questions leave a comment down below.
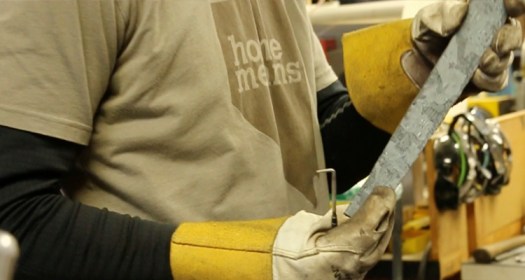
Kyle Pastrell makes these beautiful DamascusSteel Knifes. For months before that I was geeking out on his awesome knives and finally, the other day we set a date to spend the day at his Dad’s black smith operation in the garage of his house. It was awesome.
That said, my blacksmithing skills are 100% beginner. That was the first time I set a piece of metal into a forge and hit it with a hammer.
Of course, there is no better way to learn something than doing it, so the first day we committed to making a single day knife. Kyle makes really nice knives… but they always take him a few days at the least. So the idea of making a knife in a day was a stretch, but stretching feels good.
Lessons Learned
Overall workmanship on this knife is average at best. The steel is a bit soft because we didn’t have time to temper the blade in oil quite like Kyle would have preferred.
We also forgot to eat so I got pretty shaky towards the end of the day. That’s why my epoxy job was just about as disgusting as it could have been.
We did get lucky in that the knife is well balanced. It’s centered almost perfectly so it actually feels excellent in hand.
It seemed cool to me to keep the old railroad impressions on the butt of the knife. That maintained it’s crude look.
It would be possible to bandsaw the handle off, reforge and grind a little more and make this blade something really special. Perhaps I’ll reforge this one every time I make another 9 knives so this one could become a Damascus beauty like the ones Kyle makes.
That’s a really long way away for me.
Videography Notes
Autofocus is problematic with maker videos. Even though I love some of the beautiful depth of field shots that I get from the d70, it’s the G7X that I find to be the trustworthy camera to shoot with. Best of all, the G7X makes video files that work well with my version of Adobe Premiere.
I love the versatility and indestructibility of my GoPro Silver, but my footage is REALLY hard to edit. For some reason, that footage kills my editing software. It takes way too long to render. There had to be a better way, but so far GoPro software seems really unhelpful.
Thank You
Big thanks to my friend Erik who showed me the first few maker videos. Also, bit thanks to Diresta, Primitive Technologies and Birth of a Tool for your amazing movies. Finally, and without precedent, thank you again to Kyle Pastrell. It’s a huge complement to receive an invite to come work with you for the day buddy. I look forward to future projects.
This one isn’t great, but I feel like it’s a good start.
Crossing from Sacramento to Reno right now is impossible because of the snow. Highway 50 has collapsed and I-80 is subject to close often because so many inexperienced snow drivers use it. This is how we crossed the sierras without either of those highways.
This is an image from CA-20 which has stunning views. We often drive this road in the summer because there are great cliff jumping spots on the Yuba River. It’s actually not even that snowy right now, the snowy part comes later.
Reno Snow – California is Wet
So the drive from Reno to Sacramento is usually a two hour quickie, but today we spent about six hours on the road getting from Capital City to the Biggest Little City. Despite the hyper inefficiency of it all, I had a great time.
I’m not going to lie, this is an ideal way for me to spend the day. While lots of people consider this a sort of emergency or terrible day, I love it.
Putting on chains, driving where few others drive, seeing small towns in naturally beautiful places; I love it.
When we did get back to Reno, I was excited to stop driving. The drive took about six hours. It would have taken a lot less time if we had gone straight there, but CalTrans closed the road a few minutes before we got to almost the peak of the Sierra Nevada Mountains. Therefor we drove a lot of extra miles because we didn’t know the road wasn’t open.
There are two new towns I want to visit in the summer. One is Downieville, CA, the other is Sierra City, CA. Both of these cities look like great places to write a book or to go on an amazing Yuba River adventure.
There are a lot of Blue Apron reviews out there. I believe this one captures the essence of what it means to subscribe to Blue Apron.
Getting a big box of delicious food and 3 recipes that you’ve probably had no experience cooking is not easy. This is not a fast way to eat.
It’s an exercise in creating slow, beautiful food art. If you decide to order, you’ll learn a lot about food, ingredients and cooking excellent meals. If you’re trying to save yourself time, it might be better to go with something else.
I think of my Blue Apron subscription as a school in a box.
Click here to get three free meals. You can cancel the day your first box arrives if you decide it’s not a good fit for you. Canceling is very easy via their platform. I actually planned on canceling and just getting the meals, but I’m going to keep it up now.
Blue Apron Reviews
The most important thing to know if you’re deciding to give Blue Apron a try is what it’s like to create the dishes. Think of it like a cooking school in a box. The process of creating these dishes is not easy. It takes though and innovation, but the end result really is delicious.
Blue Apron is About Learning
Here’s my favorite thing looking back at the experience now: I learned a lot! That is a huge positive. I had never used apple cider vinegar to cook in the past. Next time I cook any sort of thick, leafy greens, I know it’s great to break them up with a little vinegar. I didn’t read that anywhere, I learned it not because the recipe said it was a good idea, but because I followed the recipe and now intrinsically understand what vinegar does to collared greens.
Cooking time aside, a Blue Apron membership does save time in the overall cooking process. If I were to go out searching for all these ingredients at a supermarket, I would probably just give up and get something more simple.
Neither my wife or I had ever eaten catfish before! While cooking, I didn’t even try it because I was so focused on not screwing the cooking part up. So when we sat down, we were quite surprised at how delicious the fish was.
My Own Blue Apron Reviews
If you’re just trying to eat healthy and save time, trying something else. If you’ve got some time, want to try something challenging and want to push yourself to be a better at cook, do the Blue Apron thing. You can order from their website. The ordering process is very, very easy. Here’s a coupon for three free meals. If you don’t like it after the first order, it’s easy and free to cancel:
My friend and I are going to make a series of maker videos in the coming months. Before I start working directly with him, I want to develop a bit of experience with maker video editing. In the last few months, I’ve become fascinated with these maker videos.
I want to get some practice making good videos about building things before we start our School Bus conversion. We are planning that the moment we get our drop-shipping store to monthly profitability with a team to manage the day to day.
This is my first shot at making a maker video. I purposely have kept the video unlisted as I it’s just an easy, fast experiment to learn some of the mistakes before I’m really trying to make something great.
What is Happening Here
In this video I just fix a pair of scissors with Sugru.
Sugru is just some putty that cures to be really durable rubber. It’s great stuff for fixing all sorts of problems.
It’s a very simple project on purpose. All I’m doing is gluing scissors together using a single product. The reason for making a video wasn’t to make the best maker video of all time, but to do something quick so I could practice making and publishing a maker video. The best way to learn is to make mistakes doing.
Maker Video Editing Experiment
Maker Video Lessons Learned:
Manual Focus – The wacky focus is due to the autofocus moving around. When sped up it really takes away from the shot. Also, the autofocus is wrong often so it tends to grab the wrong place. I switched the camera towards the end of the project from auto focus to manual focus and the last few seconds were much better.
Speed up Rates – Most of this is sped up to 300% I feel l like this is a bit fast, but it’s in the ball park of right on.
Editing Time – These videos take FAR less time to edit than my previous travel videos. This is a much less intense editing style. Very good news.
If you found this useful or have any tips for doing great maker videos, please share them in the comments. I’d love to hear from you.
It wasn’t just that they had a great space, delicious food and sophisticated booze. The organizers did an excellent job of picking local artists to be a part of the event.
I left the party thinking, “Wow, Reno really is a great place!”
The above movie was pretty much shot on the fly with my Cannon G7X. I wasn’t planning it at all, but I think it came out well.
Who Served at the Reno Patagonia Grand Opening?
If you’re interested in any of the businesses listed in this video, I’ve listed them below: